A localization kit is probably the last thing you’re thinking while developing your game. You as a game developer create and design your game. You are completely immersed in it, thinking about the story, characters, dialogues, and landscapes. And once you finish it, you also want to show it to the whole world. And you can successfully do this if you use a localization kit for your localization that’s project specific and use it as starting point to localize your game.
Table of contents
Why do you need to localize your game?
The answer is simple and complex at the same time. And here are some reasons and potential answers:
- when having a version of your game adapted to the target language, more people will be able to play and enjoy your product.
- you enlarge your fan base to your target markets and, consequently, increase your sales and profits.
- with so many games on the market and such a sophisticated audience, you can’t just release a product and expect it to be played, downloaded, and sold automatically.
- maybe you created the best game in English as it’s the communication language by default, but keep in mind that not all the countries have the same English proficiency. Or perhaps you developed your product in Korean, German, or Japanese? To reach the international market, it’s important to translate and localize your game into multiple languages.
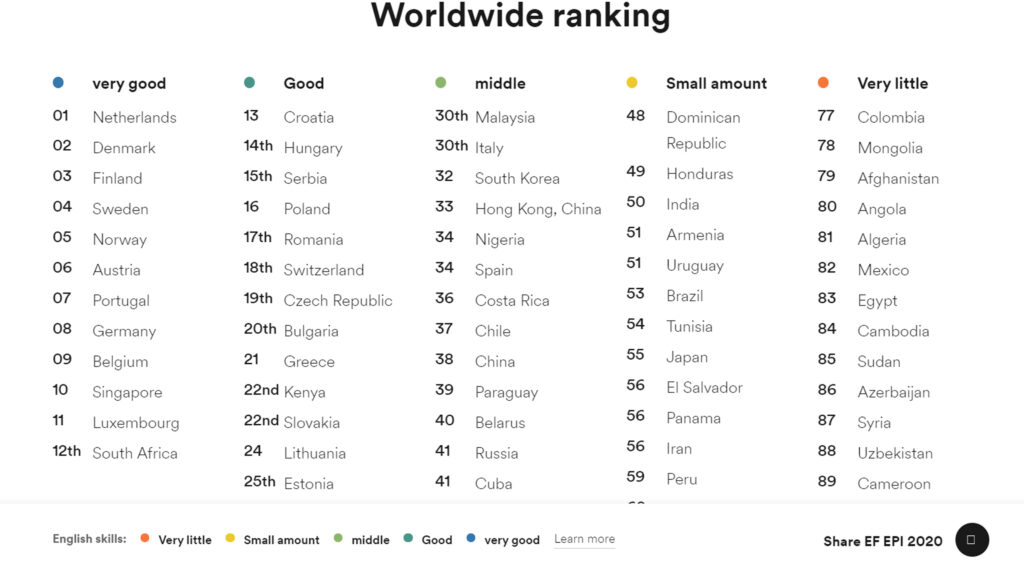
However, we must mention that regardless of what market you are launching your game into or want to expand, you’ll want as many players as possible to choose your game and hope they’ll never want to give it up. That’s why you must be enjoyable and authentic.
Things To Consider
Before starting this exhausting, daunting, and exciting journey toward your game localization, you should consider giving extra thought to this process.
That’s right. Start to think about localizing your product even before developing it with your product team. And during this stage. And after.
If you want to create a good and healthy foundation for translated versions of your playing and offer a great gaming experience, think about your localization process from the beginning.
Just dreaming of a game that fits a specific market is not enough. As you create it, you are also the only one who fully knows the context, the history, and the style associated with every string of your game. And precisely that’s why having an effective localization kit (or loc kit) is crucial when dealing with your playing for translating and adapting it for new markets.
What is a localization kit?
Building a localization kit should include everything your translation and localization teams need to complete their job. It holds all the to-be-translated files, all the information, and all other resource files you consider necessary for creating the translation. The more relevant info you give, the better the translation process and the chances to get a high-quality translated text.
What do you need to include in your localization kit?
1. Your target audience
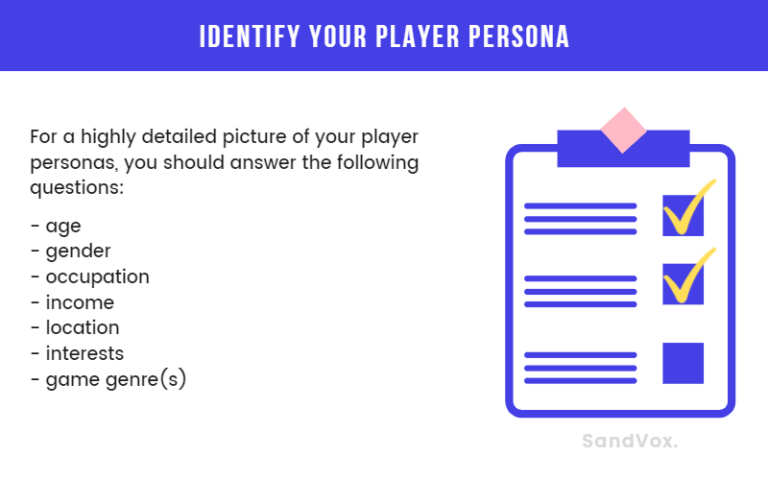
Who will play your game? Definitely, you thought about a type of gamer while developing your product. What does he look like? You have to describe it as detailed as you can – gender, age, style (casual/formal/ironic/hardcore, etc.), location, other styles of games they might like and play, income, and any other info that will help to create an accurate profile.
2. Your formatting preferences
Formatting style is not just a matter of preferences but also a foolproof way to ease communication. A proper (and consistent) formatting style will facilitate the connection between your game’s characters and your audience; it’s a signal to the gamers that you know how to engage with them.
It’s also important to remember that the localization project manager and linguist specialists who handle the translation and localization of your game don’t know your preferences. And if you want them to format the text in a way that suits your workflow, you should include:
- capitalization preferences
- punctuation style
- preferred abbreviations
- any other style preferences.
3. Introduce the characters of your story
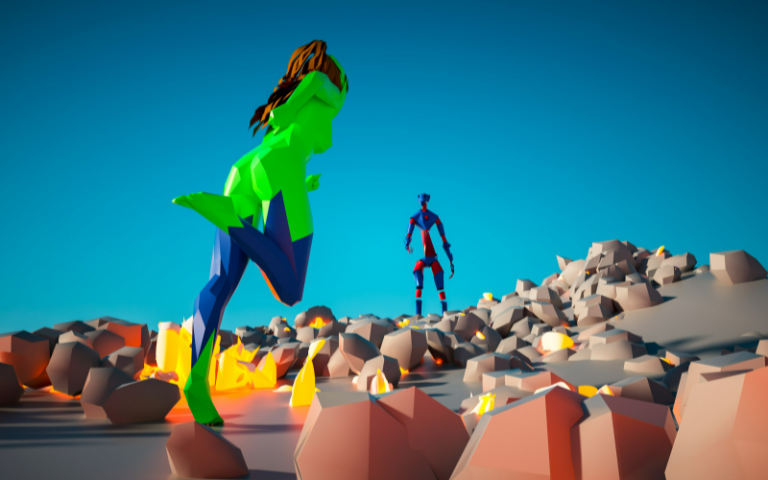
Who are the characters of your game? Don’t just mention them, but go deeper into every character’s backstory, sharing more information about him/her. Include her/his name, picture, description, gender, age, biography, personality, and status /rank.
How do you want your heroes to be portrayed? Provide descriptions such as “Character X talks like a grumpy old man.” or “Character Y is smart but acts like a child.”
Your players don’t need to know so much about your game’s heroes from the beginning because they’ll find out more during the story, but your translation and localization teams do.
Why? Because if you genuinely want to have the same essence of your characters in every translated version of your game, they need to fully understand these characters, their roles in your game, and how they operate. Remember, your characters are not just lines of codes, they’re real. Or at least they should be if you want captivating, engaging, and realistic playing.
4. Describe the tone used in your playing
After introducing your gaming heroes, don’t forget to describe the tone of voice for the whole game and each character.
Is your game supposed to be formal or informal? Is the game a parody and has a sarcastic tone? Does it have a funny tone? Or is everything somber, gritty, and dark?
All these options will alternate your video game translation, as the localization efforts will vary drastically according to your specific voice and tone.
5. Details about your game
To have a localized game that accurately depicts the original version of your playing, you should provide your localization management with as much information as possible. Because before getting gamers that engage with your playing, your translators should fully immerse your world which is an essential part of the localization strategy.
Maybe there are details of your game, and you are the only one who knows them. Are there creatures in your game? Then mention them.
- Make a list of animals/monsters/fairies/any other creatures and include their descriptions, gender, pictures, and other references.
- Note how they speak (if they speak.)
- Note their evolutions, as well as the differences between similar creatures.
Write everything down, even if you think it is irrelevant now.
Also, even if they seem irrelevant, don’t forget to include information about your game’s objects. Make a glossary of vehicles, weapons, and other items, including brief descriptions, graphic files, and explanations of relevant information (especially if they are unique to your game). Your localization vendor can use this glossary for their translation memory to keep consistency throughout the game.
With all this info you provide your translators with the additional context they need to replicate the original version of your game while speeding all things to do an amazing job.
6. Include the contextual details in your localization kit
Speaking about context – the more info you provide, the better the localization.
Let’s take as an example the genders used in conversation in different languages. In English, the nouns and adjectives are not gendered, like in other languages. This means that you say
- “He is a great doctor” if you’re referring to a man and
- “She is a great doctor” if you’re referring to a woman.
In German, on the other side (and in many other languages), you say:
- “Er ist ein sehr guter Arzt” – if you’re referring to a man and
- “Sie ist eine sehr gute Ärztin” if you’re referring to a woman.
Even if this might seem like a very minor point for someone, it will sound strange and unprofessional to the German audience and thus reduce their enjoyment of the game. In other words, knowing the gender of your characters is extremely important to have an accurate localization.
How can you provide your localization team with more context information?
Here are some tips:
Contextual notes
As mentioned before, don’t be afraid to share as many details as you can about your story, and its contextual development, even if you might think it’s overwhelming for your translators. Too much info on a localization file is far better than not enough. When you can, add images of characters, as they can also help with context.
String name and order
As mentioned before, to have a great localization outcome, you must provide as much context as possible. And organizing your strings in a logical way is one of the main solutions.
Don’t arrange them in alphabetical order. The best solution is to organize your text chronologically, but when this is not possible, try to sort them by character, by quest, or by stage.
String IDs can also include hints that help LSPs understand when and how to use this string.
List all your tags
Your translation and localization team needs to know the function and meaning of each tag you use, so they can translate accordingly. For example: What string will appear instead of the tag? Can it be moved in the sentence? Or, can it be plural?
These are questions that need answers.
7. Provide editable text files
Not everyone uses the same translation tools, nor the translation management systems, to edit text. That’s why you have to ensure that your localization team can easily edit your strings using their translation set of tools, which enables them to provide you with localization of consistent quality.
Remember that translators or LSPPs you hire are not developers. This means you should never hardcode strings that need to be localized.
Otherwise, you limit your localization team by forcing them to work only on your development software. Consequently, they can include more inconsistencies and is less efficient. As a result, you lose time and money. And you don’t want this.
8. Questions and Answers Section
Think about this section as a FAQ section or an additional help Section. Do you think there are still some foreseeable questions about your game? Then it’s time to write them down and provide answers ahead the time.
For example: Should the character/location names be localized? Or should be the title of the game translated?
Even if it can be a daunting task for you, think that every question and answer you include here will save lots of precious time for your team. The time you will spend anyway when going back and forth (after the localization ends) to explain the concepts behind the original characters or story included in your original game. Why not save all this time?
Localization Kit – Takeaway
Even when you put all the greatest human efforts possible into creating the perfect loc kit, you can still miss things. That’s why your translation team or agency will ask you additional questions. By answering them, you’ll provide all the data they need to give you the best localization outcomes.
And this is a good thing! Consider this time as an opportunity to better each other and set the frame and rules for your cooperation.
Because localization is a challenging process for all those involved. But once it’s finished and has great results that suit the needs and preferences of your target audience, your game is ready to conquer the whole world. And everything starts with a great localization kit!


